Quick Start
Get up and running with ConvoFlow in minutes.
This guide will walk you through creating your first chatbot workflow in ConvoFlow.
Prerequisites
Make sure you have ConvoFlow installed and running. If not, follow the Installation Guide first.
Step 1: Create a New Workflow
- Open ConvoFlow in your browser (typically
http://localhost:3000) - Click the "New Workflow" button or start with an empty canvas
- You'll see the workflow builder interface with a node sidebar
Step 2: Add Nodes
Every workflow needs at least two nodes:
- QueryNode: Entry point for user input (required)
- ResponseNode: Exit point that returns the final response (required)
Tip: Click the "+" button or open the node sidebar to see all available nodes.
Adding a QueryNode
- Click "Add Node" or open the node sidebar
- Find "QueryNode" in the "I/O" category
- Click on it to add it to the canvas
- Click on the node to configure it - set a default query like "Hello!"
Adding a Language Model Node
- Add a "LanguageModelNode" from the "AI & Language Models" category
- Configure it:
- Select a service (OpenAI, Groq, etc.)
- Choose a model
- Optionally set a system prompt
Adding a ResponseNode
- Add a "ResponseNode" from the "I/O" category
- This node will output the final response
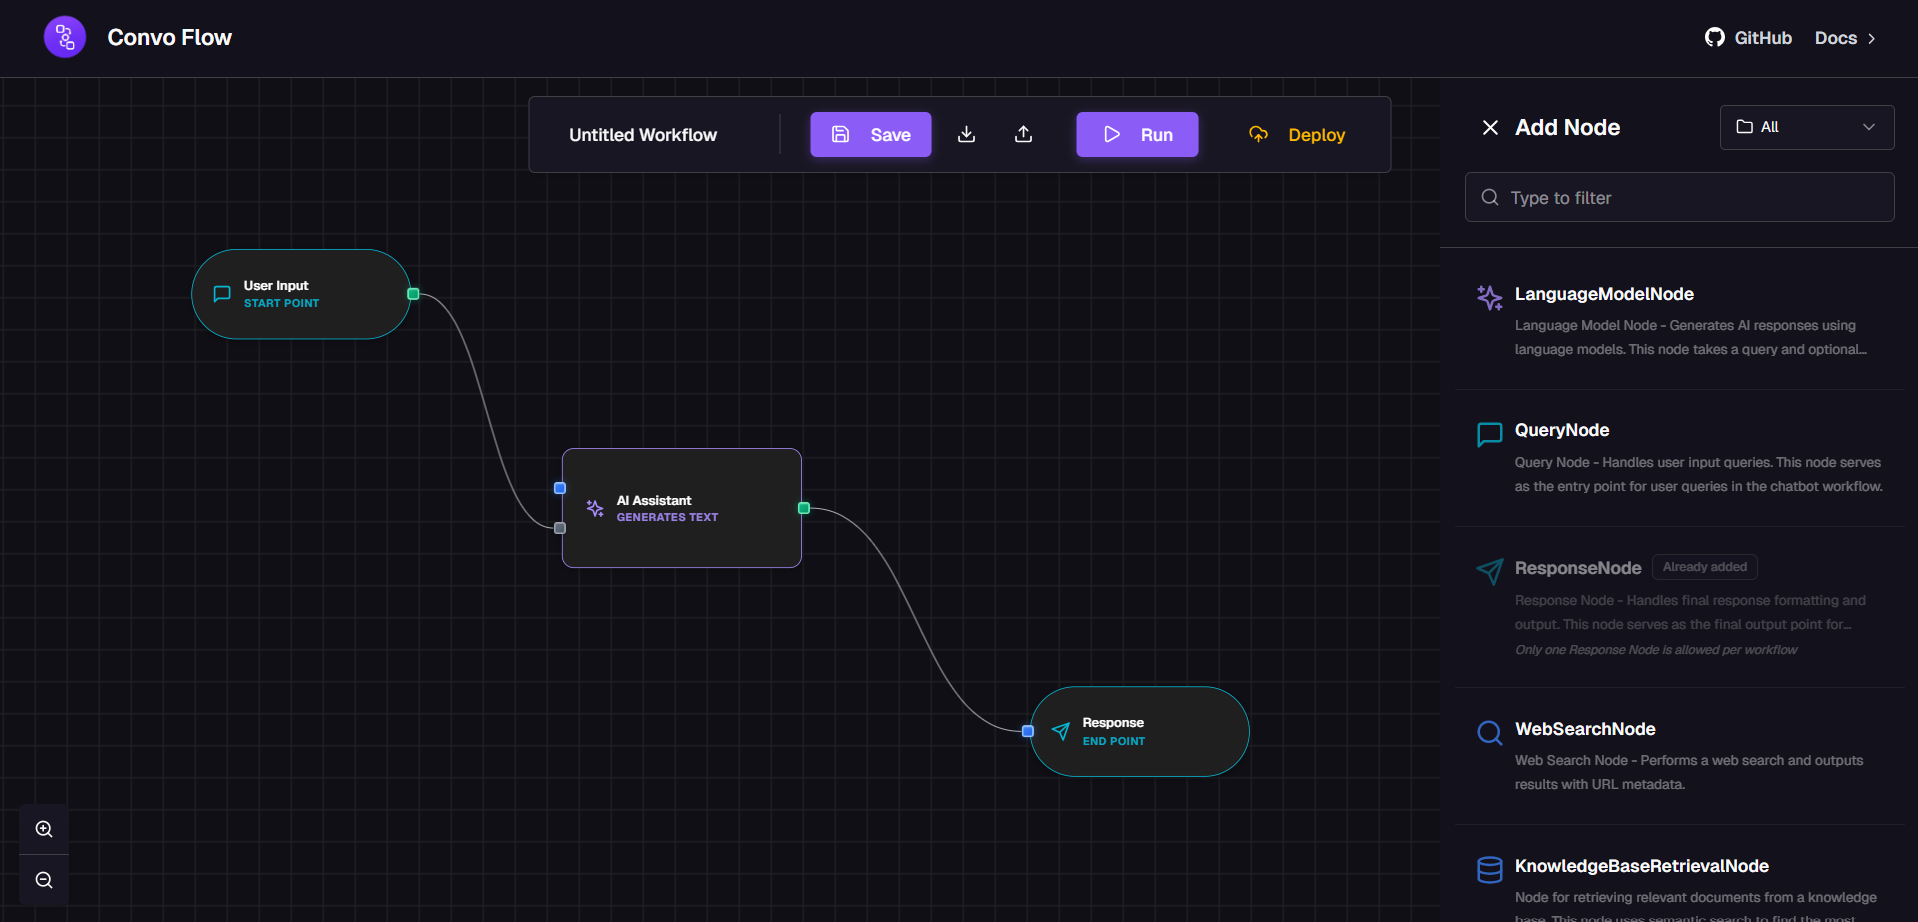
Step 3: Connect Nodes
Connect nodes to create a flow:
- Hover over the QueryNode - you'll see output handles
- Click and drag from the "query" output to the LanguageModelNode's "query" input
- Connect the LanguageModelNode's "response" output to the ResponseNode's "response" input
Your workflow should look like this:
Step 4: Configure API Keys
If you're using AI services, make sure to configure API keys. Here's the credentials page where you can manage all your API keys:
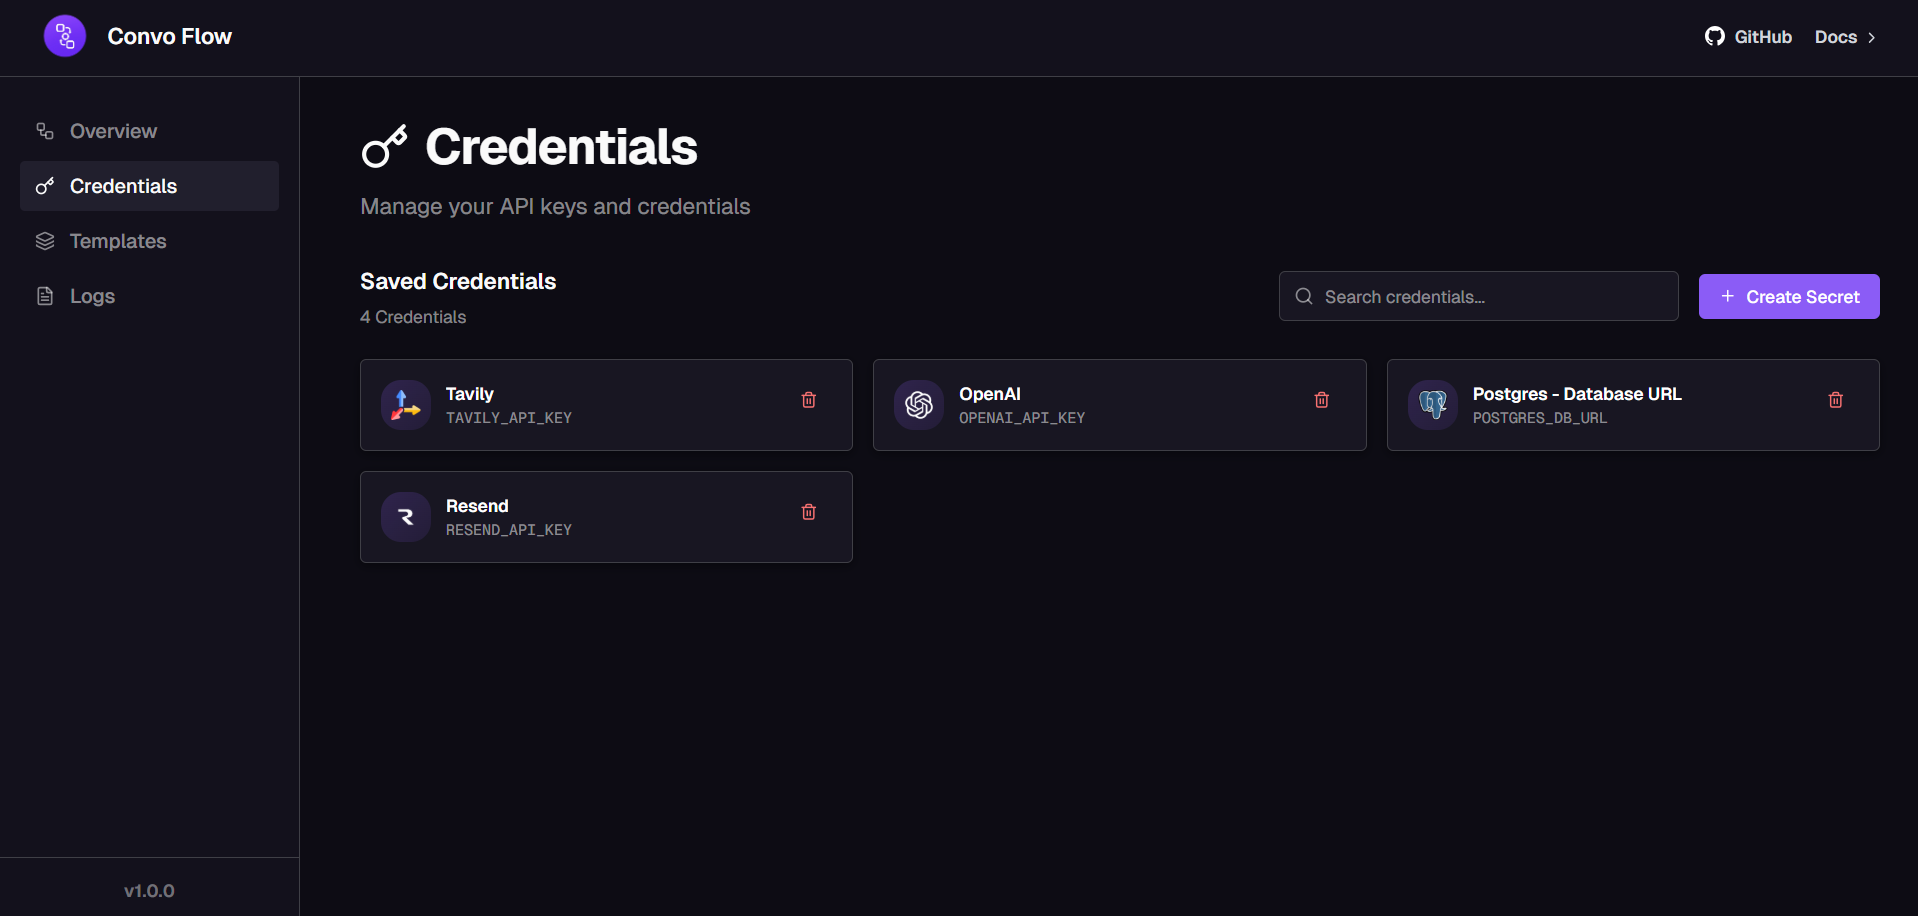
- Go to Settings (usually in the top navigation)
- Navigate to "Credentials" or "API Keys"
- Add your API keys (OpenAI, Groq, etc.)
- Save the configuration
Note: You can also set API keys via environment variables in your .env file.
Step 5: Execute the Workflow
- Click the "Execute" or "Run" button in the workflow builder
- Watch as nodes execute in order (you'll see visual indicators)
- Check the ResponseNode to see the final output
Step 6: Save Your Workflow
Save your workflow for later use:
- Click "Save Workflow" or use the save icon
- Give your workflow a name and description
- Your workflow is now saved and can be loaded later
Next Steps
Now that you've created your first workflow, explore more advanced features:
- Build a more complex chatbot
- Add knowledge base retrieval
- Learn about advanced workflow patterns
- Create custom nodes
Congratulations! 🎉
You've successfully created your first ConvoFlow workflow! Explore the documentation to learn about more advanced features and customization options.